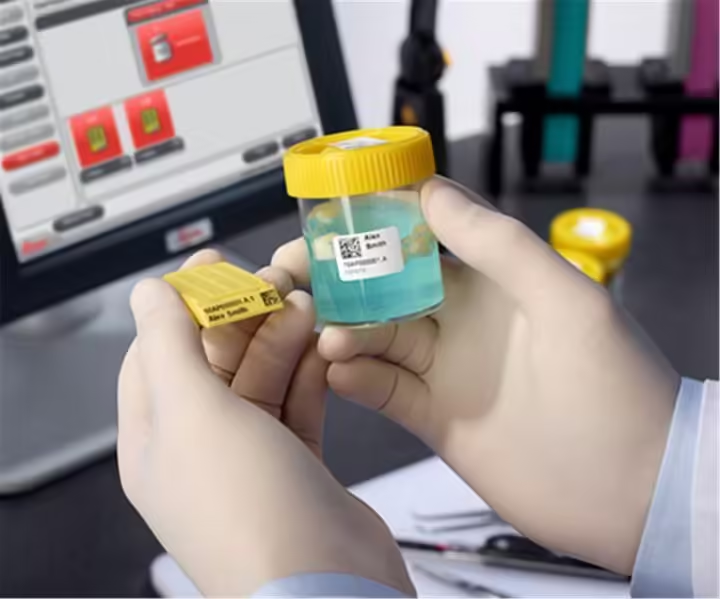
The reception of histological samples in a lab ensures high-quality analysis, accurate results, and effective patient care. It plays a vital role in histology’s overall workflow, influencing the efficiency and reliability of diagnostic processes.
Importance of Histology Lab Reception
- Sample Integrity
- Handling Protocols: Ensure careful handling to prevent damage or degradation.
- Storage Conditions: Maintain appropriate temperature and conditions during reception.
- Accurate Documentation

- Labelling: Confirm the correct labelling of samples with unique identifiers.
- Record Keeping: Maintain detailed records of patient information and sample type.
- Quality Control
- Initial Assessment: Evaluate samples for quality and any visible issues (e.g., contamination).
- Standard Operating Procedures (SOPs): Follow established SOPs to ensure consistent quality.
- Prioritization
- Urgent Cases: Identify and prioritize samples that require expedited processing based on clinical urgency.
- Workflow Management: Organize samples to streamline processing efficiency.
- Processing Workflow
- Seamless Transition: Facilitate quick transfer of samples to subsequent processing stages (fixation, embedding).
- Turnaround Time: Optimize the workflow to ensure timely results for clinicians.
- Communication
- Clinical Liaison: Foster communication between lab staff and clinicians to clarify any special instructions or concerns.
- Feedback Loop: Establish a system for ongoing communication regarding sample status and results.
- Preventing Errors
- Error Reduction Protocols: Implement checks to minimize mix-ups or mislabelling (e.g., double-checking samples).
- Training: Provide regular training for lab personnel on proper reception techniques.
Components of Histopathology Records
- Patient Information
- Demographics: Name, age, sex, and medical record number.
- Clinical History: Relevant medical history, symptoms, and previous diagnoses or treatments.
- Sample Details
- Type of Sample: Description of the sample type (e.g., biopsy, resection).
- Source: Anatomical site from which the sample was obtained (e.g., lung, liver).
- Date and Time: The sample was collected and received in the lab.
- Processing Information
- Fixation Details: Type of fixative used and duration of fixation.
- Embedding Process: Embedding method (e.g., paraffin, resin).
- Sectioning Parameters: Thickness of sections and staining protocols applied.
- Microscopic Findings
- Cellular Morphology: Description of cell types, architecture, and any abnormalities.
- Staining Results: Interpretation of stains used (e.g., H&E, special stains).
- Pathological Features: Identifying lesions, tumours, or inflammatory changes.
- Diagnosis
- Final Diagnosis: A clear and concise statement of the diagnosis based on findings.
- Differential Diagnosis: Consideration of alternative diagnoses that may be relevant.
- Comments and Recommendations
- Additional Observations: Any notable findings that may not fit within the main diagnosis.
- Follow-up Suggestions: Recommendations for further testing or clinical management based on findings.
- Signatures and Credentials
- Pathologist’s Signature: The final report should be signed by the reporting pathologist.
- Credentials: Include the pathologist’s qualifications and any relevant certifications.
Importance of Accurate Recording
- Clinical Decision-Making: Accurate recordings support clinicians in making informed treatment decisions based on histopathological findings.
- Legal Documentation: Histopathology records serve as documents that can be referenced in disputes or further investigations.
- Research and Education: Well-documented cases contribute to clinical research, case studies, and educational resources for training healthcare professionals.
- Quality Assurance: Detailed recordings facilitate quality control measures and audits within the lab, ensuring adherence to best practices.
Specimen Labelling
- Unique Identifier
- Sample ID: To avoid mix-ups, each specimen should have a unique identifier (e.g., accession number).
- Barcodes: Use barcodes for electronic tracking and easy data retrieval.
- Patient Information
- Patient Name: Include the full name to ensure proper identification.
- Medical Record Number: Incorporate the patient’s medical record number for accurate referencing.
- Sample Details
- Type of Sample: Specify the type (e.g., biopsy, excision) to provide context for processing.
- Site of Collection: Indicate the anatomical site (e.g., right lung, left kidney) to help diagnose.
- Date and Time
- Collection Date: Include the date the sample was collected.
- Time of Collection: If relevant, note the time to account for any time-sensitive analyses.
- Clinical Information
- Referring Physician: Record the physician’s name who requested the test for communication purposes.
- Clinical History: Briefly note any relevant clinical details or instructions that could impact interpretation.
- Fixative Type (if applicable)
- Fixative Used: Indicate the type of fixative (e.g., formalin) to inform processing protocols.
Practices for Specimen Labelling
- Durability
- Waterproof Labels: Use waterproof and smudge-proof labels to ensure that information remains legible throughout processing.
- Label Placement
- Proper Positioning: Place labels on containers, not on the tissue itself, to avoid confusion and potential loss of identification.
- Double-Checking
- Verification Process: Implement a double-check system where a second person verifies the label against the accompanying documentation to prevent errors.
- Standardization
- Consistent Format: Use a standardized label format to ensure uniformity and ease of recognition.
- Electronic Systems
- LIMS Integration: Utilize Laboratory Information Management Systems (LIMS) to track and manage specimen data electronically, enhancing accuracy and reducing human error.
Importance of Proper Labelling
- Preventing Errors: Accurate labelling helps prevent the misidentification of specimens, which can lead to incorrect diagnoses and treatment.
- Ensuring Traceability: Clear labelling allows for easy tracking of specimens through the entire laboratory process, from receipt to final reporting.
- Facilitating Communication: Well-labelled specimens enable effective communication between laboratory personnel and clinicians.
- Compliance and Audits: Proper labelling meets regulatory standards and facilitates compliance with laboratory accreditation requirements.