Introduction
- Processing histological tissues for paraffin embedding is a fundamental technique in histopathology and biomedical research.
- This process is essential for preserving tissue architecture, cellular details, and molecular components, allowing for subsequent microscopic examination and diagnostic analysis.
- Proper preparation ensures that tissues are adequately fixed, dehydrated, cleared, and infiltrated with paraffin, providing the structural integrity needed for precise sectioning.
- The following outline highlights the key steps involved in preparing tissues for paraffin embedding, emphasizing the importance of each stage in maintaining tissue quality and reliability of histological results.
- Processing histological tissues for paraffin embedding involves several key steps to ensure that the tissue is preserved, well-infiltrated with paraffin, and can be sectioned for microscopic analysis. Below is a standard outline of the process:
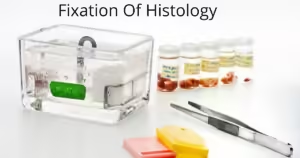
Tissue Fixation
Step 1: Tissue Collection
1.1 Ensure Freshness
- Tissue samples should be collected quickly after the human sample is obtained to minimize autolysis and putrefaction.
- The time between excision and fixation should be minimized, especially for delicate tissues.
1.2 Prepare the Tissue
- Trim the tissue to a 3–5 mm thickness in any dimension. This allows the fixative to penetrate evenly and thoroughly.
- The shape and orientation of the tissue may be important, especially for preserving anatomical or cellular details, so handle the tissue carefully.
Step 2: Choosing the Fixative
2.1 Select the Fixative Based on Tissue and Analysis
- 10% Neutral Buffered Formalin (NBF) is most commonly used for routine histology. It preserves tissue morphology well.
- For specialized purposes, other fixatives may be used:
- Glutaraldehyde for electron microscopy (better ultrastructure preservation).
- Bouin’s solution is for delicate tissues like testes or for preserving glycogen.
2.2 Prepare Fixative Solutions
- If using 10% Neutral Buffered Formalin:
- It is typically prepared as a 4% formaldehyde solution in phosphate buffer to maintain a neutral pH.
- Always use freshly prepared or properly stored fixative solutions to avoid degradation of the fixative’s effectiveness.
Step 3: Immerse Tissue in Fixative
3.1 Sufficient Volume
- Immerse the tissue in 10–20 times the volume of the tissue. A large volume of fixative ensures that the tissue is adequately bathed in the solution.
- For example, if you have a 1 cm³ piece of tissue, immerse it in at least 10–20 cm³ of fixative.
3.2 Use Proper Containers
- Use containers made of inert materials like plastic or glass. Ensure the containers are large enough for the fixative to surround the tissue.
- If you’re processing multiple samples, use separate containers to avoid cross-contamination.
Step 4: Fixation Time
4.1 Fixation Duration
- Tissue is typically fixed in formalin for 6–24 hours, depending on the size and type of the tissue. Larger tissues may require up to 48 hours.
- The standard fixative penetration rate for formalin is about 1 mm per hour, so a 5 mm thick tissue block would need at least 5–6 hours for complete fixation.
4.2 Avoid Over-Fixation
- Do not exceed 24–48 hours unless specified, as prolonged fixation can result in hardening and poor sectioning.
Step 5: Fixation Conditions
5.1 Temperature
- Room temperature (18–25°C) is adequate for most routine fixation.
- Cold fixation (4°C) can be used for sensitive tissues, especially to preserve antigenicity for immunohistochemistry or enzyme activity.
Step 6: Post-Fixation Washing
6.1 Rinse in Phosphate-Buffered Saline (PBS) or Water
- After fixation, it’s important to rinse the tissue with PBS or tap water to remove any remaining formalin. This step helps prevent the formation of formalin pigment and prepares the tissue for subsequent processing steps.
- Formalin pigment (black precipitates) may form if the formalin solution becomes acidic. Rinsing minimizes this risk.
6.2 Storage (Short Term)
- If the tissue is not processed immediately after fixation, it can be stored in PBS at 4°C or left in fixative for a short time (a few days maximum). Prolonged storage in formalin can lead to over-fixation, making sectioning and staining difficult.
Step 7: Troubleshooting and Adjustments
7.1 Adjust for Tissue Type
- Fatty Tissues (e.g., brain, breast): These tissues are difficult to fix and may require longer fixation times or multiple fixative changes.
- Calcified Tissues (e.g., bone): Decalcification may be required after fixation to ensure proper sectioning.
7.2 Fixation Artifacts
- Formalin Pigment: If acidic conditions cause pigment deposition, treat the tissue with alcoholic picric acid or saturated alcoholic lithium carbonate to remove the pigment.
- Over-Hardening: If the tissue becomes overly hard due to prolonged fixation, it may be softened by soaking in a mild acid solution (e.g., 1% acetic acid) for a short time.
Step 8: Preparing for Dehydration
8.1 Trim the Tissue
- Once fixation is complete, re-trim the tissue block if necessary to ensure the tissue is uniform in size and free from any damaged or uneven areas.
- Ensure that the surface of the tissue is exposed for proper dehydration, clearing, and infiltration steps to follow.
8.2 Ready the Tissue for Processing
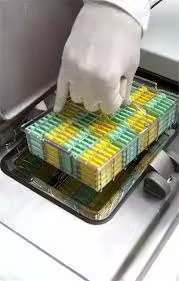
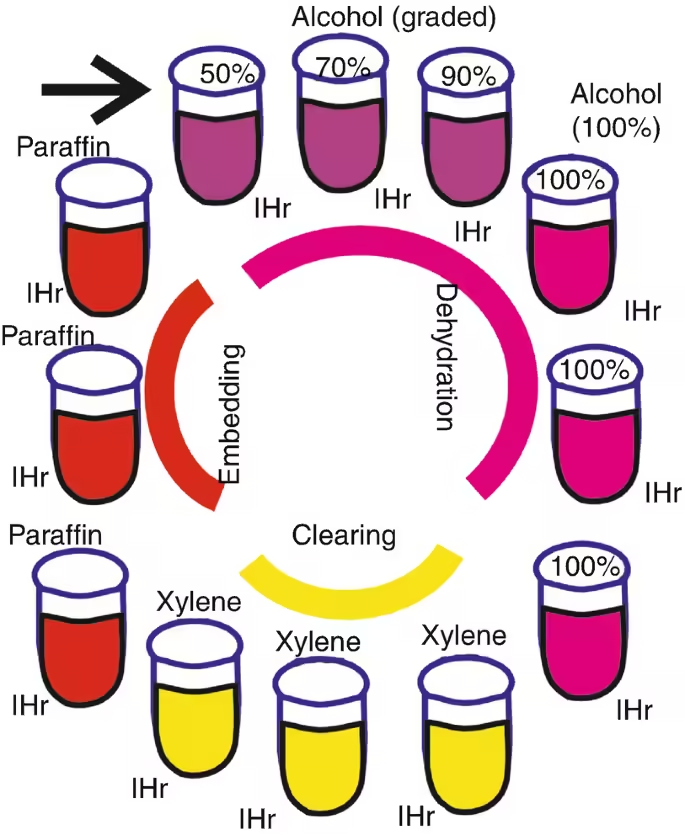
- After fixation, the tissue is ready for further processing, which involves dehydration through graded alcohols, clearing with a solvent such as xylene, and paraffin embedding for sectioning.
Dehydration
Purpose: Dehydration removes water from tissue because paraffin and other embedding media are hydrophobic. If water remains, it can interfere with embedding and sectioning.
Materials:
- Graded series of ethanol: 70%, 80%, 95%, 100%
- Dehydration containers
- Timer
Procedure:
1.1 Immerse Tissue in 70% Ethanol
- Place the fixed tissue in a container with 70% ethanol.
- Allow the tissue to sit for 1–2 hours. This step begins the gradual removal of water without causing tissue shrinkage or distortion.
1.2 Transfer to 80% Ethanol
- Move the tissue to 80% ethanol for 1 hour. The increased ethanol concentration continues to remove more water.
1.3 Transfer to 95% Ethanol
- Place the tissue in 95% ethanol for 1–2 hours.
- At this point, most water has been removed, but some residual water may remain.
1.4 Immerse in 100% Ethanol
- The tissue is placed in 100% ethanol for 1–2 hours. This step is critical to dehydrate the tissue fully.
- Repeat the 100% ethanol step at least twice to ensure complete dehydration.
Clearing
Purpose: Clearing removes and replaces ethanol with a substance (typically xylene) miscible with ethanol and paraffin wax, preparing the tissue for paraffin infiltration.
Materials:
- Xylene (or alternatives like toluene or chloroform)
- Clearing containers
Procedure:
2.1 Immerse in Xylene
- Transfer the fully dehydrated tissue into a container with fresh xylene.
- Keep the tissue immersed in xylene for 1–2 hours for small or delicate samples or up to 4 hours for larger, dense samples (like brain or muscle).
2.2 Repeat Clearing with Fresh Xylene
- Transfer the tissue to a fresh container of xylene and allow it to sit for another 1–2 hours.
- Repeat the clearing step 2–3 times to ensure complete replacement of ethanol with xylene. Any residual ethanol left in the tissue will interfere with paraffin infiltration.
2.3 Check Tissue Transparency
- Properly cleared tissues should appear translucent or transparent. Opaque tissues may indicate incomplete dehydration or clearing.
Paraffin Infiltration
Purpose: Infiltration replaces the xylene in the tissue with molten paraffin, which supports the tissue for sectioning.
Materials:
- Molten paraffin wax (melting point: 56–60°C)
- Paraffin infiltration oven or embedding station
- Timer
Procedure:
3.1 Transfer Tissue to Molten Paraffin
- Place the cleared tissue in a container with molten paraffin maintained at 60°C.
- Ensure the paraffin completely covers the tissue to allow proper infiltration.
- Keep the tissue in paraffin for 1–2 hours for small samples or 2–4 hours for larger samples.
3.2 Change Paraffin Baths
- Transfer the tissue to fresh paraffin after every 1–2 hours to ensure the complete removal of xylene and full infiltration of paraffin.
- Vacuum infiltration can help pull the paraffin into the tissue more effectively for particularly large or dense tissues.
Embedding
Purpose: Embedding the tissue in a solid paraffin block prepares it for sectioning. The tissue needs to be oriented properly so that it can be cut in the correct plane.
Materials:
- Embedding moulds (metal or plastic)
- Molten paraffin wax
- Embedding station with a cooling plate or ice tray
Procedure:
4.1 Prepare Embedding Mold
- Place a mould on the heated embedding station surface.
- Pour a small amount of molten paraffin into the mould to form a base layer.
4.2 Position the Tissue
- Transfer the paraffin-infiltrated tissue from the container into the mould using warm forceps.
- Orient the tissue properly to ensure the correct face will be sectioned (e.g., if cutting through skin, place the skin surface down).
- Pour additional molten paraffin over the tissue to completely cover it.
4.3 Cool the Mold
- Place the mould onto a cooling plate or ice to solidify the paraffin quickly.
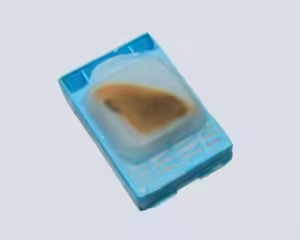
- Once solidified (30–60 minutes), the paraffin block can be removed from the mould and is ready for sectioning.
Sectioning
Purpose: Sectioning is cutting thin slices of tissue, typically 4–10 microns thick, which are thin enough to be viewed under a microscope.
Materials:
- Rotary microtome
- Microtome blades
- Water bath (set to 37–42°C)
- Glass microscope slides
- Brush or forceps
Procedure:
5.1 Trim the Paraffin Block
- Place the paraffin block in the microtome and trim the excess paraffin to expose the tissue surface. The block should have smooth, even edges for precise sectioning.
5.2 Cut Thin Sections
- Use the rotary microtome to cut 4–10 microns thick sections. The thickness depends on the tissue type and the desired analysis.
- As you cut, the sections will form ribbons connected by the paraffin at their edges.
5.3 Float Sections on a Warm Water Bath
- Float the ribbon of sections on a 37–42°C water bath to help them flatten.
- Carefully guide the sections with a brush or forceps to remain flat and smooth.
5.4 Transfer Sections to Slides
- Using clean glass slides, pick up the sections from the water bath. Ensure the tissue is centred on the slide.
- Place the slides vertically to allow excess water to drain.
Drying
Purpose: Drying the slides ensures the tissue adheres firmly and removes residual moisture before staining.
Materials:
- Slide-drying oven or hot plate
- Clean racks for slide storage
Procedure:
6.1 Dry Slides in Oven
- Place the slides in a slide-drying oven at 37–40°C for 1–2 hours. This low heat helps remove residual moisture without damaging the tissue.
6.2 Alternatively, Air-Dry
- If time permits, slides can be air-dried at room temperature overnight. This method is gentler but takes longer.