Introduction
-
Microtomes are precision laboratory instruments used for cutting uniform, ultra-thin sections of specimens.
-
They are essential in histology, pathology, microbiology, and research laboratories.
-
Thin tissue sections prepared by microtomes allow clear microscopic visualization of cellular and tissue architecture.
-
The quality of staining and microscopic interpretation largely depends on the accuracy of microtome sectioning.
-
Microtomes can cut sections ranging from a few micrometers (µm) for light microscopy to nanometer thickness for electron microscopy.
-
Different types of microtomes are designed to handle soft tissues, hard tissues, frozen samples, and resin-embedded specimens.
-
Proper selection, correct operation, and regular maintenance of microtomes are critical for reliable diagnostic and research outcomes.
-
With advancements in technology, modern microtomes provide high precision, safety, and efficiency in tissue sectioning.
Basic Components of a Microtome
- Specimen holder (block holder): Holds the tissue embedded in paraffin or resin
- Knife or blade: Steel, glass, or diamond cutting edge
- Feed mechanism: Advances the specimen by a fixed thickness
- Thickness adjustment knob: Controls section thickness
- Handwheel or motor: Drives the cutting motion
- Base and frame: Provides stability and alignment
Types of Microtomes
Rotary Microtome
Introduction
- The rotary microtome is an essential tool for producing thin sections of biological tissues, often embedded in paraffin, which allows for the study of tissue structure at the microscopic level.
- With medical diagnostics, research, and education applications, the rotary microtome is invaluable in pathology and histology labs.
- It enables technicians and researchers to prepare tissue samples that reveal the cellular architecture and structure of organs, tumours, or other tissue types.
Principle of the Rotary Microtome
- The rotary microtome operates on a mechanical advancement principle where each rotation of the handwheel or turn of the motorized drive advances the specimen holder toward a stationary blade by a specified distance.
- This precise, incremental movement is controlled by a calibrated thickness adjuster, which allows for the accurate and repeatable slicing of tissues. Embedding the sample in paraffin achieves stability and firmness, essential for slicing delicate biological specimens.
- Each handwheel rotation moves the specimen block forward by a set thickness, ranging from 1 to 25 micrometers.
- This enables uniformity in section thickness, which ensures that the slices are consistent and suitable for various staining and microscopic examination techniques.
Parts of the Rotary Microtome
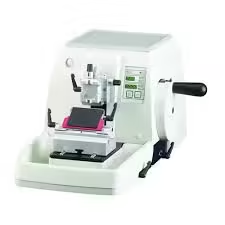
A rotary microtome is the most commonly used microtome in histopathology laboratories for cutting thin paraffin sections (3–5 µm). It works by moving the specimen vertically against a stationary knife with high precision.
1. Base / Frame
-
Heavy metal body
-
Provides stability and reduces vibration during sectioning
2. Handwheel
-
Controls the cutting motion
-
Rotating the handwheel moves the specimen up and down
-
Equipped with a locking mechanism for safety
3. Specimen Holder (Block Holder)
-
Holds the paraffin-embedded tissue block
-
Allows orientation and alignment of the specimen
4. Specimen Clamp / Orientation Head
-
Secures the tissue block firmly
-
Permits angular adjustment of the block face
5. Feed Mechanism
-
Advances the specimen toward the knife by a preset distance
-
Ensures uniform section thickness
6. Thickness Adjustment Knob
-
Graduated control used to select section thickness
-
Common range: 1–60 µm
7. Knife / Blade
-
Steel knife or disposable blade
-
Performs the cutting action
8. Knife Holder / Blade Clamp
-
Holds the knife securely in correct position
-
Allows adjustment of clearance angle
9. Clearance Angle Adjustment
-
Controls angle between knife edge and block face
-
Usually maintained between 3–8°
10. Section Deflector / Anti-roll Plate
-
Prevents curling or rolling of sections
-
Helps in smooth ribbon formation
11. Waste Tray
-
Collects paraffin shavings and waste sections
-
Keeps work area clean
12. Safety Guard
-
Covers the blade when not in use
-
Prevents accidental injuries
Working on a Rotary Microtome
- Specimen Preparation:
- The tissue specimen is first embedded in paraffin wax, which provides stability. The paraffin block is trimmed to expose the tissue surface and then secured onto the specimen holder.
- Blade and Knife Holder Setup:
- The blade is inserted into the knife holder, and the angle is adjusted based on the tissue type. Blade angle and sharpness are critical for smooth cuts without causing tears or compressions.
- Setting Section Thickness:
- Using the thickness adjustment knob, the desired section thickness is set (e.g., 4 µm for routine histology or 1 µm for ultrathin sections).
- Handwheel Operation:
- The handwheel is rotated manually or automatically, advancing the specimen incrementally. Each handwheel turn causes the specimen block to advance toward the blade, slicing off a thin tissue section.
- The anti-roll plate holds the tissue slice flat, making it easier to collect.
- Section Collection:
- Sections are carefully collected using tweezers or a brush and are placed on microscope slides for staining and analysis.
Maintenance of the Rotary Microtome
- Daily Cleaning:
- Remove paraffin residue and tissue debris after each use to prevent buildup, which could affect performance.
- Blade Maintenance:
- Ensure blades are sharp; either sharpen or replace dull blades to maintain section quality.
- Lubrication:
- Regularly lubricate the advance mechanism, handwheel, and other moving parts according to the manufacturer’s recommendations.
- Calibration:
- Periodically calibrate the thickness adjustment settings, ensuring accurate and consistent section thickness.
- Anti-roll Plate:
- Clean and align the anti-roll plate to prevent sections from curling or rolling.
- Environmental Control:
- Store the microtome in a controlled environment to prevent the paraffin from softening or becoming too brittle.
Advantages of a Rotary Microtome
- High Precision:
- Produces highly uniform sections with excellent thickness consistency, ideal for detailed histological analysis.
- Versatile Section Thickness:
- Adjustable thickness control allows a range from ultra-thin to thicker sections, suitable for various applications.
- Efficient for Serial Sectioning:
- Ideal for serial sections, often used in pathology to view tissue changes across adjacent slices.
- Ease of Use and Reproducibility:
- Once properly set up, the rotary microtome provides efficient, repeatable cuts, ideal for high-volume labs.
- Durability:
- With proper care and maintenance, rotary microtomes are highly durable and can function for years.
Disadvantages of a Rotary Microtome
- Not Ideal for Hard or Frozen Specimens:
- Rotary microtomes can struggle with hard materials like bone or frozen tissues, damaging the blade.
- Requires Regular Maintenance:
- It must be regularly cleaned, calibrated, and lubricated to maintain performance, adding to time and cost.
- Risk of Injury:
- Using sharp blades poses a safety risk, so handling requires skill and proper safety protocols.
- Initial Cost and Training:
- High-quality rotary microtomes can be expensive; training is necessary to operate them effectively.
Sliding microtome
Introduction
- The sliding microtome is a laboratory instrument specialized for cutting thin, uniform sections of biological specimens, particularly large, hard, or embedded in materials like resin or paraffin.
- Used extensively in histology, botany, and research, this type of microtome is ideal for tough samples such as plant materials, wood, bones, or large animal tissues.
- Its ability to slice these materials with high precision is invaluable for scientific and medical studies.
- It allows microscopic examination of samples that would otherwise be too difficult to section with other microtomes.
Principle of the Sliding Microtome
- The sliding microtome operates on a fixed blade and moving specimen principle.
- Unlike rotary microtomes, where the specimen advances toward a rotating blade, in a sliding microtome, the specimen is mounted on a sliding carriage, which moves horizontally across a stationary, fixed blade.
- Each pass of the specimen over the blade produces a thin slice, with section thickness controlled by an adjustable setting on the advanced mechanism.
- This setup reduces compression on the sample, a key advantage for harder or larger specimens.
- Cutting is typically performed manually, although some models have a motorized carriage for smoother, consistent movement.
Parts of a Sliding Microtome
A sliding microtome is used for cutting large, hard, or whole tissue specimens by moving the knife horizontally across a fixed specimen. It is commonly used in research laboratories and for whole organ sectioning.
1. Knife (Cutting Blade)
-
Long steel knife with a sharp cutting edge
-
Slides horizontally during sectioning
-
Suitable for large and firm tissue blocks
2. Knife Holder / Knife Carriage
-
Holds the knife securely
-
Allows smooth sliding motion along guide rails
-
Permits adjustment of knife angle (clearance angle)
3. Specimen Holder (Block Holder)
-
Holds the tissue block firmly in position
-
Specimen is usually embedded or clamped
-
Adjustable in vertical direction
4. Feed Mechanism
-
Advances the specimen upward toward the knife
-
Controls thickness of sections cut
5. Thickness Adjustment Control
-
Graduated knob or micrometer screw
-
Allows precise selection of section thickness
6. Sliding Rails / Guide Ways
-
Provide smooth, straight path for knife movement
-
Ensure uniform cutting without vibration
7. Handwheel / Drive Handle
-
Operates the sliding motion manually
-
In some models, motor-assisted movement is present
8. Base / Bed Plate
-
Heavy metal base
-
Provides stability and minimizes vibration
9. Section Collection Tray
-
Positioned below the knife
-
Collects cut sections during sectioning
10. Clamp and Locking System
-
Secures specimen holder and knife carriage
-
Prevents unwanted movement during cutting
Working on a Sliding Microtome
- Specimen Preparation:
- The specimen, usually embedded in a hard material like paraffin or resin, is trimmed and shaped for optimal mounting. It is then secured into the specimen holder on the sliding carriage, ensuring it is stable and well-aligned.
- Blade and Knife Holder Setup:
- The blade is inserted into the knife holder, and its angle is adjusted to suit the specimen’s properties. The knife holder is then locked to keep the blade stable during cutting.
- Thickness Adjustment:
- The thickness adjustment knob is set to the desired thickness, which dictates the amount of vertical advancement the specimen makes with each pass across the blade. Typical thicknesses range from 1 µm (for thin sections) to 50-100 µm for thicker sections.
- Sliding Mechanism Operation:
- The horizontal carriage holding the specimen slides manually or automatically across the blade. The blade slices a thin section from the specimen with each pass, producing a flat, even cut.
- After each pass, the advance mechanism moves the specimen upward by the set thickness, ensuring each new section is consistent with the previous ones.
- Section Collection:
- The thin section is removed from the blade area using a brush or tweezers and carefully placed on a microscope slide for staining and microscopic analysis.
Maintenance of a Sliding Microtome
- Daily Cleaning:
- Remove paraffin or resin residue from the blade, specimen holder, and carriage after each use. Cleaning prevents buildup that could interfere with smooth operation.
- Blade Maintenance:
- Inspect blades regularly and replace or sharpen as needed. Dull blades can lead to poor-quality sections and may damage the specimen.
- Lubrication:
- Lubricate moving parts such as the horizontal carriage and advance mechanism periodically, following manufacturer guidelines. Lubrication helps maintain smooth movement and reduces wear.
- Calibration:
- Regularly calibrate the thickness adjustment and advance mechanism. Accurate calibration is essential for obtaining consistent section thicknesses, especially when producing very thin slices.
- Environmental Control:
- Maintain a stable, controlled environment for the microtome, as fluctuating temperatures can cause paraffin blocks to soften or harden unpredictably, affecting sectioning quality.
Advantages of a Sliding Microtome
- Ideal for Hard and Large Specimens:
- Capable of handling larger, denser, and harder materials like wood, bone, and plant tissues, which are challenging for rotary microtomes.
- Minimized Compression:
- The stationary blade setup reduces the risk of compression, which is particularly beneficial for preserving the structural integrity of tougher tissues.
- Precision and Control:
- Allows precise section thickness adjustment, resulting in consistent, uniform sections. This level of control is beneficial for research where fine detail is critical.
- Versatile Blade Options:
- Accommodates various blade types (e.g., glass, diamond) for specific specimen needs, making it adaptable to different hardness levels.
- Reduced Specimen Tearing:
- The blade’s fixed position and the sliding specimen setup reduce the risk of tearing delicate tissue structures.
Disadvantages of a Sliding Microtome
- Less Suitable for Soft Tissues:
- Sliding microtomes are not ideal for soft, delicate specimens as the sliding motion can cause tearing or distortion in these materials.
- Requires More Maintenance:
- Due to several moving parts, frequent maintenance, lubrication, and calibration are necessary to ensure optimal performance.
- Slower Operation:
- Typically slower than rotary microtomes, making them less efficient for high-throughput labs that require quick processing of many samples.
- Requires Skill and Training:
- Operating a sliding microtome effectively, particularly when adjusting for different specimen types, requires training and experience.
- Safety Considerations:
- With an exposed blade and manual operation, there is a higher risk of injury if safety protocols aren’t followed carefully.
Cryostat microtome
Introduction
- The cryostat microtome is an advanced instrument designed for cutting thin sections of biological specimens that are frozen.
- It integrates a microtome with a refrigeration unit to provide a controlled low-temperature environment, which preserves the morphology of fresh and delicate tissues.
- This technology is particularly crucial in clinical pathology, allowing for immediate microscopic examination during surgical procedures (frozen section analysis), which aids in rapid diagnosis.
- The ability to quickly prepare and examine specimens has made cryostats indispensable in hospitals and research laboratories focused on histopathology, immunohistochemistry, and molecular biology.
Working Principle in Depth
- Freezing Mechanism: The cryostat uses a built-in cooling system to lower the temperature within the chamber to levels below freezing (typically -20°C to -30°C). Specimens are usually embedded in an optimal cutting temperature (OCT) compound or frozen directly using cryogenic agents (like liquid nitrogen).
- Sectioning Process: As the specimen is frozen, the microtome blade slices through the hard frozen tissue. The freezing process allows for clear and precise cuts, minimizing deformation. The operator can set the desired thickness for each section using the advanced mechanism. After each cut, the mechanism moves the specimen slightly upward, preparing it for the next slice.
Parts and Their Functions
- Cryo-Chamber
- Material: Typically insulated metal with glass windows for visibility.
- Function: Maintains low temperatures and houses the microtome, allowing for a controlled environment that minimizes sample degradation.
- Specimen Holder
- Design: This may include a chuck that accommodates various sizes and types of specimens, ensuring a snug fit.
- Function: Provides stability and precision during sectioning, reducing vibrations and movement.
- Microtome Blade
- Material: Made from stainless steel, ceramic, or glass, depending on the application.
- Function: The blade’s sharpness and quality directly affect section quality. High-quality blades ensure clean cuts and minimal tearing.
- Anti-Roll Plate
- Design: Flat and smooth, placed just in front of the blade.
- Function: Keeps the freshly cut sections flat, preventing curling or rolling, which can complicate the staining and analysis.
- Advance Mechanism
- Types: Can be manual (crank-driven) or motorized.
- Function: Controls the vertical movement of the specimen for each section cut, ensuring consistent thickness.
- Control Panel
- Features: Often includes LCD screens for temperature monitoring and setting and dials or buttons for adjustment.
- Function: Allows users to set and monitor the temperature and cutting parameters easily.
- Cooling System (Compressor)
- Design: Typically includes a refrigeration compressor and a fan system for air circulation.
- Function: Responsible for maintaining the low temperatures required for effective cryosectioning.
Working
- Specimen Preparation:
- The specimen may be embedded in OCT to provide structural support. It is then quickly frozen in the cryostat or using a cryogenic agent.
- Mounting:
- Once frozen, the specimen is securely attached to the specimen holder. This is crucial for stability during sectioning.
- Temperature and Thickness Adjustment:
- The operator selects the appropriate temperature based on the tissue type. The thickness is set according to the experimental requirements.
- Cutting Process:
- The microtome blade is advanced towards the specimen, slicing through it as the carriage moves horizontally. The sections are cut and transferred to slides for further processing or immediate examination.
- Post-Cutting:
- Sections are collected, stained, and mounted for microscopic analysis. Staining techniques may vary based on the intended diagnostic purpose.
Maintenance
- Daily Cleaning:
- After use, the chamber and blade area should be cleaned thoroughly with appropriate solvents (e.g., ethanol) to remove any residual tissues and prevent contamination.
- Blade Care:
- Inspect blades for nicks or dullness. Dull blades can lead to poor sectioning and should be replaced. Proper storage of blades can prolong their life.
- Routine Calibration:
- Regularly check the temperature settings using an external thermometer to ensure accuracy. Periodically, it may be necessary to calibrate the temperature settings with a reference standard.
- Defrosting:
- Regularly defrost the chamber if ice builds up, which can impair the cooling efficiency and affect performance.
- Inspection of Mechanical Parts:
- Routinely check for wear and tear on moving parts and ensure that lubricants are applied as the manufacturer recommends.
Advantages
- Rapid Diagnosis:
- Cryostats enable quick, real-time decision-making in clinical settings, which is vital during surgeries where immediate feedback is needed.
- High-Quality Sections:
- The freezing process maintains tissue morphology and allows for clear, detailed sections that enhance microscopic examination.
- Versatility:
- Cryostats can handle various tissue types and are compatible with multiple staining techniques, including histological and immunohistochemical methods.
- Preservation of Enzymatic Activity:
- Because tissues are frozen rather than chemically fixed, the enzymatic activity within the cells is preserved, allowing for enzyme histochemistry applications.
- Reduced Sample Processing Time:
- The quick freezing and sectioning processes significantly reduce the time needed for sample preparation compared to traditional paraffin embedding.
Disadvantages
- Limited to Soft and Fresh Tissues:
- While effective for many tissue types, cryostats may struggle with extremely hard tissues, such as calcified specimens, which can be challenging to cut.
- Cost:
- Cryostat microtomes are generally more expensive than conventional microtomes due to their sophisticated design and cooling capabilities, leading to higher upfront costs for laboratories.
- Training Requirement:
- Operators need specialized training to handle cryostats effectively, particularly in optimizing sectioning parameters and handling frozen tissues.
- Contamination Risk:
- Samples may become contaminated if strict protocols are not followed, especially when using multiple samples in a clinical setting.
- Complexity of Maintenance:
- The combination of refrigeration and microtome technology requires more comprehensive maintenance than standard microtomes, including regular cooling system servicing.
Applications of Cryostat Microtome
- Clinical Pathology: Used extensively for frozen section analysis during surgeries, providing real-time diagnostic information.
- Research Laboratories: In research settings, cryostats facilitate the analysis of tissues in various studies, including cancer research, developmental biology, and immunology.
- Immunohistochemistry: Allows researchers to apply specific stains or antibodies to identify cellular markers and structures, crucial for diagnostic purposes.
- Environmental and Botanical Studies: Besides animal tissues, cryostats can be used to analyze plant tissues, particularly in cell structure and physiology studies.
Ultramicrotome
Introduction
- An ultramicrotome is a specialized instrument used to cut ultra-thin sections of biological specimens, typically less than 100 nanometers thick.
- These sections are essential for electron microscopy, allowing for detailed examination of cellular structures and organelles at the nanometer scale.
- Ultramicrotomes are crucial in fields such as cell biology, histology, and materials science, where high-resolution imaging is necessary to study fine structural details.
- The ability to produce such thin sections is vital for obtaining clear images in transmission electron microscopy (TEM) and scanning electron microscopy (SEM).
Principle
- The principle behind the ultramicrotome is to utilize a sharp blade to slice ultra-thin sections from a well-embedded specimen, often using resin for optimal support.
- The specimen is typically prepared in a rigid embedding medium (like epoxy resin) to provide stability for cutting extremely thin slices.
- The ultramicrotome employs a precise mechanical advance system, enabling the user to control the thickness of each section with high accuracy.
- This precision is critical for producing high-quality sections suitable for electron microscopy, as thicker sections can lead to poor imaging quality.
Parts of an Ultramicrotome
An ultramicrotome is a highly precise instrument used for cutting ultra-thin sections (50–100 nm) for transmission electron microscopy (TEM). Its parts are designed to ensure nanometer-level accuracy, stability, and vibration-free cutting.
1. Specimen Holder (Block Holder)
- Holds resin-embedded tissue block (epoxy or acrylic resin)
- Allows precise positioning and orientation of the specimen
2. Knife Assembly
- Consists of glass or diamond knife
- Mounted in a knife holder
- Produces ultra-thin sections with smooth edges
3. Knife Boat (Water Trough)
- Attached to the knife
- Filled with distilled water
- Sections float on water surface after cutting
4. Feed Mechanism (Ultrafine Advance System)
- Advances specimen toward the knife in nanometer steps
- Determines exact section thickness
5. Thickness Control Unit
- Digital or mechanical control
- Adjusts section thickness (typically 50–100 nm)
6. Drive Mechanism / Cutting Arm
- Moves specimen smoothly against the stationary knife
- Ensures uniform cutting motion
7. Motor Unit
- Provides controlled, vibration-free movement
- Essential for consistent ultrathin sectioning
8. Control Panel
- Used to set cutting speed and section thickness
- Digital display in modern ultramicrotomes
9. Section Pickup System
- Copper grids, loops, or eyelash tools
- Used to collect floating ultrathin sections
10. Base and Frame
- Heavy, rigid structure
- Minimizes vibration and external disturbances
11. Binocular Microscope / Viewing System
- Helps visualize block face and sections during cutting
12. Anti-Vibration System
- Shock-absorbing mounts or vibration isolation table
- Essential for nanometer-scale precision
Working
- Specimen Preparation:
- The biological specimen is first fixed, dehydrated, and then embedded in a resin, such as epoxy or acrylic. This embedding provides support and stability for ultra-thin sectioning.
- Mounting the Specimen:
- The embedded specimen block is mounted onto the specimen holder (chuck). The specimen must be securely fastened and properly oriented to ensure precision during sectioning.
- Setting Parameters:
- The operator sets the desired section thickness on the control panel. Ultramicrotomes can typically produce sections ranging from 10 nm to 100 nm, depending on the specimen and the blade used.
- Cutting Process:
- The cutting arm moves the sharp blade horizontally across the specimen. The advance mechanism moves the specimen holder slightly after each cut, allowing the next section to be sliced.
- The anti-roll plate helps keep each section flat as it is cut, preventing curling.
- Collecting Sections:
- The ultrathin sections are collected, often using a fine brush or directly onto a grid for electron microscopy analysis. Each section must be handled carefully to avoid tearing or damaging them.
Maintenance
- Daily Cleaning:
- After each use, clean the microtome, especially the cutting area and the specimen holder, using appropriate solvents to remove tissue residues and avoid contamination.
- Blade Maintenance:
- Inspect the blade regularly for nicks or dullness. Diamond blades may last longer but can still become dull and need replacement. Proper storage is crucial to prevent damage.
- Calibration:
- Regularly calibrate the cutting mechanism and check the thickness settings using standard materials to ensure accuracy.
- Lubrication:
- Keep the moving parts of the ultramicrotome lubricated according to the manufacturer’s guidelines to ensure smooth operation and prolong the life of the equipment.
- Regular Inspections:
- Conduct periodic inspections of all mechanical parts and ensure no loose components or signs of wear and tear.
Advantages
- High Precision:
- Ultramicrotomes can cut extremely thin sections (often less than 100 nm), crucial for high-resolution imaging in electron microscopy.
- Versatility:
- Capable of sectioning a variety of materials, including biological tissues, polymers, and metals, making them valuable in multiple research fields.
- Excellent Section Quality:
- Produces clean, flat sections with minimal compression or deformation, essential for accurate imaging and analysis.
- Adaptability:
- Advanced ultramicrotomes offer various settings and options for adjusting parameters, accommodating various specimens and research needs.
- Improved Imaging:
- Thin sections allow electron beams to penetrate more easily, enhancing image quality and detail in microscopy studies.
Disadvantages
- Cost:
- Ultramicrotomes are often significantly more expensive than standard microtomes due to their precision components and specialized blades.
- Complex Operation:
- The precision required for ultramicrotome operation demands a skilled operator, which may necessitate training and experience.
- Maintenance Requirements:
- The need for regular maintenance and care can add to the overall cost of ownership and operational complexity.
- Limited Thickness Range:
- While ultramicrotomes excel at producing very thin sections, they are not suited for thicker sections needed in some applications.
- Blade Fragility:
- Blades, particularly diamond blades, can be fragile and require careful handling, as any damage can render them ineffective.
Vibrating Microtome
Introduction
- A vibrating microtome is a specialized cutting device designed for sectioning biological specimens that are often difficult to slice with traditional microtomes.
- This instrument employs a unique vibrational cutting mechanism, which enhances the sections’ quality and minimises tissue damage.
- Vibrating microtomes are particularly useful for cutting soft tissues, particularly those that are fragile or delicate, and are widely used in neuroscience, pathology, and histology for preparing samples for light and electron microscopy.
Principle
- The vibrating microtome operates on the principle of oscillatory cutting.
- It uses a sharp blade that vibrates rapidly while moving horizontally across the specimen.
- Combining the vibrational motion and the blade’s sharpness allows for producing ultra-thin sections without causing significant compression or distortion of the sample.
- This method is particularly effective for hard or dense tissues, allowing for clean cuts that preserve the sample’s integrity.
Parts of a Vibrating Microtome
A vibrating microtome is designed to cut fresh or fixed tissue sections using a vibrating blade, minimizing tissue distortion. Its main parts are:
-
Vibrating Blade Assembly
-
Holds the razor blade or metal blade
-
Moves horizontally at high frequency
-
Responsible for gentle cutting with minimal compression
-
-
Blade Holder / Knife Clamp
-
Securely fixes the blade in position
-
Allows adjustment of blade angle and alignment
-
-
Specimen Holder (Specimen Plate / Stage)
-
Holds the tissue specimen firmly
-
Specimen is usually glued to the plate
-
Can be adjusted vertically for thickness control
-
-
Vibration Control Unit
-
Regulates vibration frequency and amplitude
-
Helps optimize cutting for different tissue consistencies
-
-
Section Thickness Control / Feed Mechanism
-
Advances the specimen toward the blade
-
Determines thickness of sections (usually 10–500 µm)
-
-
Motor Unit
-
Powers the vibrating motion of the blade
-
Ensures smooth and consistent oscillation
-
-
Bath / Buffer Tray
-
Contains buffer or saline solution
-
Keeps tissue moist and prevents drying
-
Helps float and collect sections
-
-
Cooling System (Optional)
-
Ice tray or cooling block
-
Maintains low temperature to preserve tissue viability
-
-
Control Panel
-
Used to set vibration speed, section thickness, and cutting speed
-
May include digital display in modern instruments
-
-
Base and Frame
-
Provides stability to the instrument
-
Minimizes vibration-related artifacts
-
-
Section Collection Tools
-
Brushes or forceps used to collect cut sections gently
-
Working of a Vibrating Microtome
- Specimen Preparation:
- The specimen is typically fixed and embedded in a suitable medium (such as paraffin or resin) to provide support during cutting.
- Mounting the Specimen:
- The prepared specimen is securely attached to the specimen holder, ensuring it is stable and properly oriented for cutting.
- Setting Parameters:
- The operator sets the desired section thickness and vibration frequency using the control panel. Section thickness typically ranges from 1 µm to 50 µm, depending on the specimen type and research requirements.
- Cutting Process:
- The vibrating mechanism is activated, causing the blade to oscillate horizontally across the specimen. This oscillation enables the blade to slice through the specimen with minimal resistance.
- After each cut, the advance mechanism moves the specimen holder forward, allowing the next section to be cut.
- Collecting Sections:
- The sections are collected on slides or other collection devices for further analysis, such as staining or microscopic examination.
Maintenance of a Vibrating Microtome
- Daily Cleaning:
- After use, clean the cutting area, blade, and specimen holder to remove any residual tissue. Use appropriate solvents like ethanol or isopropanol for disinfection and cleaning.
- Blade Inspection and Care:
- Regularly inspect the blade for nicks or dullness. Replace blades with signs of wear, as dull blades can lead to poor sectioning quality.
- Calibration:
- To ensure accurate sectioning, periodically check and calibrate the cutting parameters, especially the thickness setting.
- Mechanical Parts Lubrication:
- Keep all moving parts lubricated per the manufacturer’s recommendations to ensure smooth operation and prevent wear.
- Vibration Mechanism Maintenance:
- Inspect the motor and vibration mechanism regularly for proper function. Any abnormal noise or operation may indicate a need for professional servicing.
Advantages of a Vibrating Microtome
- High Precision:
- Produces ultra-thin sections with excellent precision, crucial for high-quality microscopy imaging.
- Minimized Sample Damage:
- The vibrational cutting mechanism reduces compression and distortion, preserving the morphology of fragile samples.
- Versatility:
- Effective for a wide range of tissues, including those that are hard or fibrous, making it suitable for various applications in histology and pathology.
- Ease of Use:
- Modern vibrating microtomes are designed for easy operation, often featuring user-friendly controls and automation options.
- Improved Section Quality:
- Sections cut using a vibrating microtome are typically flatter and more uniform than those produced with traditional methods, enhancing the quality of imaging and analysis.
Disadvantages of a Vibrating Microtome
- Cost:
- Vibrating microtomes can be more expensive than traditional microtomes due to their specialized design and technology.
- Training Requirement:
- Operators may require specialized training to effectively use and maintain the instrument, particularly in setting the appropriate parameters for various specimens.
- Limited Thickness Control:
- While capable of producing ultra-thin sections, the range of thickness that can be achieved may be narrower than other types of microtomes.
- Complex Maintenance:
- The complexity of the vibration mechanism may require more frequent maintenance and professional servicing, increasing operational costs.
- Size and Portability:
- Vibrating microtomes are often larger and heavier than standard microtomes, which can be considered in space-limited laboratories.
MCQs
1. A microtome is primarily used for:
A. Fixation of tissues
B. Staining of tissues
C. Cutting thin sections of tissue
D. Mounting of tissues
✅ Answer: C
2. The usual thickness of paraffin sections for routine histology is:
A. 0.1–0.5 µm
B. 1–2 µm
C. 3–5 µm
D. 20–30 µm
✅ Answer: C
3. The most commonly used microtome in histopathology laboratories is:
A. Rocking microtome
B. Sliding microtome
C. Rotary microtome
D. Ultramicrotome
✅ Answer: C
4. Which microtome produces ribbon-like sections?
A. Rocking
B. Rotary
C. Sledge
D. Cryostat
✅ Answer: B
5. Cryostat microtome is mainly used for:
A. Paraffin sections
B. Resin sections
C. Frozen sections
D. Plastic sections
✅ Answer: C
6. The operating temperature of a cryostat microtome is usually:
A. 0°C
B. –5°C
C. –20°C to –30°C
D. –60°C
✅ Answer: C
7. Ultramicrotomes are used for:
A. Light microscopy
B. Fluorescence microscopy
C. Electron microscopy
D. Confocal microscopy
✅ Answer: C
8. Thickness of sections cut for electron microscopy is:
A. 3–5 µm
B. 1–2 µm
C. 50–100 nm
D. 10–20 µm
✅ Answer: C
9. Knife used in ultramicrotome is commonly made of:
A. Steel
B. Tungsten
C. Glass or diamond
D. Carbon
✅ Answer: C
10. The rocking microtome is characterized by:
A. Vertical movement
B. Horizontal movement
C. Arc movement
D. Rotational movement
✅ Answer: C
11. Which microtome is suitable for large tissue blocks?
A. Rotary
B. Sliding
C. Cryostat
D. Laser
✅ Answer: B
12. Sledge microtome is best suited for:
A. Soft tissues
B. Frozen tissues
C. Very hard tissues
D. Cytology smears
✅ Answer: C
13. The feed mechanism in a microtome is responsible for:
A. Holding the knife
B. Advancing the specimen
C. Cooling the tissue
D. Staining the section
✅ Answer: B
14. Chatter in sections is commonly caused by:
A. Soft paraffin
B. Dull knife
C. Overheating
D. Excess water
✅ Answer: B
15. Compression of tissue sections indicates:
A. Excessively hard tissue
B. Incorrect knife angle
C. Over fixation
D. Under staining
✅ Answer: B
16. Wrinkling of sections occurs due to:
A. Sharp knife
B. Proper embedding
C. Dull knife
D. Correct clearance angle
✅ Answer: C
17. Clearance angle refers to the angle between:
A. Knife and specimen
B. Knife and block face
C. Knife and base
D. Knife and handwheel
✅ Answer: B
18. Ideal clearance angle in rotary microtome is:
A. 1–2°
B. 3–8°
C. 10–15°
D. 20–30°
✅ Answer: B
19. Disposable blades are commonly used in:
A. Rocking microtome
B. Rotary microtome
C. Ultramicrotome
D. Laser microtome
✅ Answer: B
20. Paraffin wax is used mainly for:
A. Fixation
B. Dehydration
C. Embedding
D. Staining
✅ Answer: C
21. Which microtome preserves enzyme activity?
A. Rotary
B. Sliding
C. Cryostat
D. Sledge
✅ Answer: C
22. Laser microtome cuts tissue using:
A. Mechanical blade
B. Diamond knife
C. Laser beam
D. Ultrasonic waves
✅ Answer: C
23. Major advantage of laser microtome is:
A. Low cost
B. No cutting artifacts
C. Simple design
D. Manual operation
✅ Answer: B
24. Sections thicker than desired are usually due to:
A. Dull blade
B. Faulty feed mechanism
C. Hard tissue
D. Excess cooling
✅ Answer: B
25. Serial sections are best obtained using:
A. Rocking microtome
B. Rotary microtome
C. Sledge microtome
D. Cryostat
✅ Answer: B
26. Safety while using microtome includes:
A. Touching blade edge
B. Using blade guard
C. Holding blade by hand
D. Cleaning while cutting
✅ Answer: B
27. Steel knives are mainly used for:
A. Electron microscopy
B. Frozen sections
C. Routine histology
D. Molecular pathology
✅ Answer: C
28. Which component controls section thickness?
A. Knife holder
B. Handwheel
C. Thickness adjustment knob
D. Base plate
✅ Answer: C
29. Tissue must be processed before sectioning to:
A. Increase thickness
B. Improve hardness
C. Enable proper cutting
D. Change color
✅ Answer: C
30. Microtomes are NOT used in:
A. Histology
B. Pathology
C. Microbiology
D. Hematology cell counting
✅ Answer: D
31. Which microtome is least precise?
A. Rotary
B. Ultramicrotome
C. Rocking
D. Laser
✅ Answer: C
32. Diamond knives are preferred because they:
A. Are cheap
B. Cut thick sections
C. Provide ultra-smooth cuts
D. Are disposable
✅ Answer: C
33. Thick-thin section artifact suggests:
A. Proper fixation
B. Smooth cutting
C. Feed mechanism problem
D. Correct blade angle
✅ Answer: C
34. Frozen sections are commonly used for:
A. Routine diagnosis
B. Rapid intraoperative diagnosis
C. Research only
D. Teaching slides
✅ Answer: B
35. Ultramicrotome sections are mounted on:
A. Glass slides
B. Plastic slides
C. Copper grids
D. Coverslips
✅ Answer: C
36. Regular lubrication of microtome helps to:
A. Increase staining
B. Improve fixation
C. Smooth movement
D. Reduce section thickness
✅ Answer: C
37. Which tissue requires sledge microtome?
A. Liver
B. Kidney
C. Bone
D. Skin
✅ Answer: C
38. Which solvent is used to clean paraffin debris?
A. Alcohol
B. Water
C. Xylene
D. Acetone
✅ Answer: C
39. The base of microtome provides:
A. Cutting action
B. Section thickness
C. Stability
D. Feed control
✅ Answer: C
40. Primary function of specimen holder is to:
A. Cut tissue
B. Hold embedded tissue
C. Cool tissue
D. Stain tissue
✅ Answer: B
41. Microtome blades should be disposed in:
A. Dustbin
B. Plastic bag
C. Sharps container
D. Sink
✅ Answer: C
42. Which microtome is best for lipid studies?
A. Rotary
B. Sliding
C. Cryostat
D. Ultramicrotome
✅ Answer: C
43. Paraffin sections are usually floated on:
A. Ice bath
B. Oil bath
C. Water bath
D. Alcohol bath
✅ Answer: C
44. Section curling indicates:
A. Sharp blade
B. Excess heat
C. Dull blade
D. Correct angle
✅ Answer: C
45. A dull knife results in:
A. Smooth sections
B. Compression and chatter
C. Better ribbons
D. Uniform thickness
✅ Answer: B
46. Ultramicrotomes require:
A. Manual operation
B. Vibration-free environment
C. Low magnification
D. Thick tissue blocks
✅ Answer: B
47. Routine histology sections are examined under:
A. Electron microscope
B. Confocal microscope
C. Light microscope
D. Fluorescence microscope
✅ Answer: C
48. Which microtome is rarely used today?
A. Rotary
B. Cryostat
C. Ultramicrotome
D. Rocking
✅ Answer: D
49. Proper maintenance of microtome ensures:
A. Better staining only
B. Safety only
C. Accurate sectioning and long life
D. Faster fixation
✅ Answer: C
50. Microtome is most closely associated with:
A. Cytology
B. Histology
C. Hematology
D. Serology
✅ Answer: B